The Crafty Surgeon

Papercrafts, mixed media and foamiran flower projects to inspire

Saturday 6 February 2021

 Lady Vagabond Decorated Box

by Gill Humphrey

I love to create pieces that are both decorative and functional so today I am sharing a rather large box decorated in a mixed media style using the Lady Vagabond papers by Stamperia.
 
The top of the box has been created using a collage of papers with some lifted on mountboard for added dimension. The papers were sealed with two layers of Pentart Matte Varnish and once dry radom areas of Pentart Transparent Crackle gel added. It is important to use the primer first and allow it to dry and I personally find that the top layer cracks better if left to dry naturally. Thin applications result in small crackles and thicker ones bigger crackles. An elastic wood trim was then added to the edges.


The rim of the box and the main box were then painted by putting blobs of assorted blue and grey Pentart Matte paints onto an Indigoblu paint mat and then picked up randomly with a sponge applying two or three different colours at the same time and building the layers until I had a stormy sky - typical British weather and just perfect for a London themed project.


Once the paints had dried I added houses cut from the papers - my box is huge and it actually required 2 sheets of 12 x 12 and 1 sheet of 8 x 8 papers. These were adhered around the base of the box with Stamperia Mixed Media glue and once this had dried the rim and sides of the box were given two coats of matte varnish. Random areas of transparent crackle glue were then added.

 
Finally to bring out the crackles and to age my piece I covered everything with Stamperia Antiquing paste wiping back the colour until I was happy with the affect. 


Wednesday 29 April 2020

A Shadow Magic Box


The latest subscription box by Craft Box UK includes a Snipart shadow box. These never come with instructions on how to put together and it occurred to me that whilst it is easy for me as I have assembled a lot of these over the last 3-5 years it might not be so obvious to others. So I have today created by shadow box using the kit from Anna Hersom - please note that I have added ephemera from my own stash to the supply that came in the kit so it is highly unlikely that you will recreate something exactly like mine but I hope you find the step by step helpful.


Take the back piece and top piece with lots of slots in and align as shown above - if you don't get the piece on the left orientated correctly it will not fit on the box and you run the risk of putting glue on the wrong side.


Locate the pieces that go into the central part of the box to make the compartments and lay them out in the order they go in before adhering in place. I find it easiest to do this in the order shown in the pictures below. 


Find and orientate the side panels - note the side panels have two gaps in them and the top and bottom panels only one. Adhere in place.


Now take the top piece as shown above and adhere this over the top of the constructed box.


Now complete the front of the box by adhering the remaining square piece over the top - this covers all of the slots and gives the box a finished appearance. 


I find it easiest to decorate the box at this stage. I cut papers to fit in each compartment - the measurements I used are written on the box picture below.


I then fill each compartment with bits and pieces. If you are going to hang it on a wall you do not need the remaining pieces of chipboard that come in the kit. If you wish your box to stand freely on a table then you need to add the remaining pieces as shown in the photos below.


Finally here are some close ups of the compartments - the depth of them despite using a lightbox for photographing them makes it quite difficult to get really light pictures because the depth of the box creates its own shadows hence its name.


Thursday 5 December 2019


As we approach this festive time of year and the special day gets closer it will soon be time to put away our Christmas themed craft products and stash them safely to use next year. Today I share with you the final Xmas project made with the Christmas Mitform metal embellishments as I think that I have so many other things to fit into my hectic schedule that it is unlikely that I will be making another Christmas project this year. I hope you like this sample and use some of the crafty techniques in other projects throughout the year. 


I wanted to use techniques inspired by the wonderful Finnabair and combine them with the Mitform products and also a series of chipboard houses that I got from 14 Craft Bar. I started by taking a box frame canvas approximately 8" x 10" and added snowflakes using a Tim Holtz stencil and black stencil paste before coating with black gesso. I then adhered the houses in a line to make a street scene. I placed a number of the non-Christmas Mitform pieces plus two of the cute Christmas Stockings below the houses spelling out the word Noel. I also added Finnabair art melange pebbles (the white dots in the picture below)  for further interest before covering the whole lot with more black gesso.


I then built up layers of colour to give depth and dimension - I sprinkled blue cast and magic sparkle luscious powders by Indigoblu over the piece and then sprayed with water to dilute and distribute the colour - this allowed the paints to settle in the crevices of the pieces. 


I wanted to bring more definition to the houses so added a shadow using midnight sky acrylic paint by Finnabair and also some splats of white acrylic paint to give the affect of snow falling. 


My next step was to add some more midnight sky paint around the sky - daubing a thick layer along the top of the piece and letting it run by spraying with water. More colour was added using waxes from Finnabair in shades of blue, green and iron.


The piece looked to me as if the houses were floating in the middle of nowhere so I then added a grounding layer using snow paste which was sprinkled with glass glitter and several shades of Tim Holtz distress glitter


The combination of glitters and mica in the luscious powders means that this piece has a sparkle that is so difficult to pick up on a camera but in real life gives a beautiful effect. - I love the luscious powders so much and the two that I chose are duo tones - the blue cast looks white in the pot but is blue on dark surfaces and the magic sparkle is white in the pot and gives a clear sparkle on white backgrounds but as in this piece a silvery shine on dark backgrounds. If you haven't tried them then I urge you to try them out.


Friday 22 November 2019


Today I am sharing with you a how to for the wonderful company Mitform_Castings. I know the pieces may be more expensive than some metal embellishments but they are absolutely worth every penny - they add weight to the project giving a luxurious feel that lighter embellishments do not deliver. I love them in mixed media pieces when I can add lots of them but even a single one on a card will add magic to your pieces. In England they are available from I Love Mixed Media and from Craft all Day Long - both companies have facebook pages and websites and in Ireland they are available from Mixed Media Place.

I enjoy using beautiful papers and making 3D pieces of home decor and so at this time of year what could be more perfect than a decorated Christmas tree.


Here I have used an MDF base by woodouts and papers from Craft O'clock called singing in the snow to provide a base on which to show case the Christmas Mitform pieces.


I covered MDF base with papers from the pack adhering them with gel medium. I then added layers of muslin and lace to give the appearance of a tree festooned with garlands, again using gel medium to stick everything down.


When adding embellishments I tend to start with the biggest items first so I selected a number of mitform pieces and glued them as shown.


I them spent a little while cutting out elements from the cut apart sheets that come with the paper pack. The floral elements and baubles were given dimension using a selection of different sized ball tools.


The fussy cut elements were added to the front of my Christmas tree with little glittery foam balls added to the centers of the flowers and scattered around like little snow balls.


The back of the piece was covered with papers and layered with more paper elements.


A pile of fussy cut presents and more Mitform pieces were placed at the bottom of the tree.


Finally the tree was edged with a snow affect paste before the whole tree and embellishments were given a dusting of snow by dry brushing on more of the snow paste
I hope that some of you will have ago at making this project and wish you and your family a love filled holiday.

Sunday 3 March 2019

Love a mixed media frame


I began creating this piece whilst the Christmas season was in full swing but knew that it was likely to be used closer to Valentine’s day and therefor chose to focus on the words “with love” as these two simple words can mean so very much.

I started by painting the back of a wooden heart decoration bought from one of the very cheap home stores in the UK using Paper Artsy ® chalk paint in Irish Cream. The other side was stuck to a piece of paper from Hugs of Roses https://14craftbar.com/home/789-scrapbooking-papers-house-of-roses-12x12.html and once the glue was dry I used a scalpel to cut the excess paper away and then sandpaper around the edge of the heart to neaten the piece.   I then applied some Prima ® light paste through a Snipart mandala stencil damask rose https://14craftbar.com/home/2018-stencil-13-damask-rosette.html  to add a layer of interest on top of the paper and again left it to dry naturally.


I created my own three dimensional accents using the long rose ornament mould https://14craftbar.com/home/2466-silicone-mold-long-ornament-b.html (two pieces) and the beautifully ornate heart frame mould https://14craftbar.com/home/1627-silicone-mold-mirror-heart.html and airdry clay https://14craftbar.com/home/1051-clay.html https://14craftbar.com/home/1051-clay.html. I wanted the long rose mould to curve around the top of one side of my wooden heart, so I carefully moulded it in the curve I wanted before leaving the pieces dry completely. The texture on these pieces was then highlighted using Prima® icing paste in old gold. I cut one of the long ornament pieces apart to give me 2 swirls, 2 rose buds and the central big rose piece.


Whilst the clay was drying I chose my paper pieces – I used a frame from the Yesterday ephemera pack https://14craftbar.com/home/1800-ephemera-cards-yesterday.html cutting off the outer part to leave me with an oval piece that I split in two. I then chose 3 tags and I topper from the vintage time A4 sheet 009 https://14craftbar.com/home/2037-scrapbooking-paper-a4-sheet-vintage-time-009.html  and layered them on top of each other using off cuts of cardboard to give dimension and leave space for embellishments 
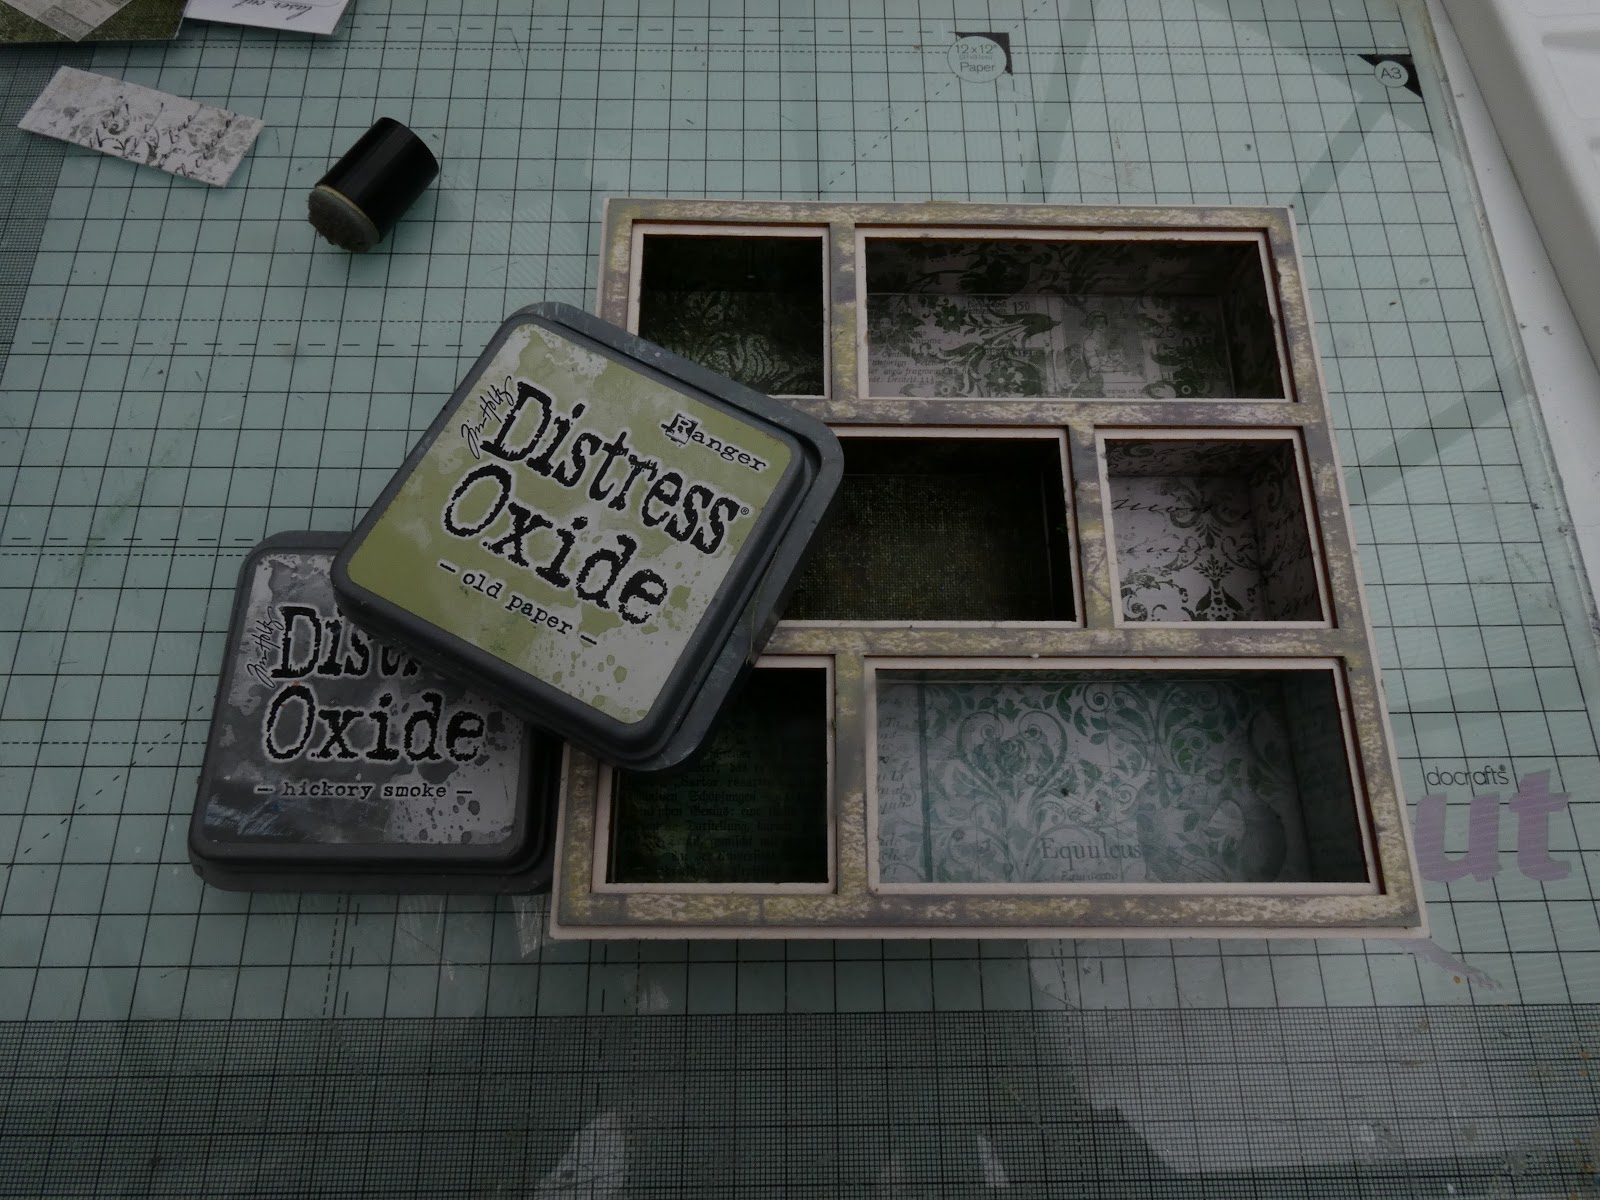
to be tucked in. The paper pieces were then edged with Ranger® distress oxide in old paper and to tie the papers to the heart I distressed the edge of the wooden heart using the same ink and a sponge dauber.   I fussy cut the roses from the remains of the piece of paper I had used to cover the heart with so that I could balance the flowers on the right side of the heart.


The chipboard word “with love” and frame were then embossed with Stampendous ® frantage aged rose embossing powder.


I adhered my cluster of papers to the heart and tucked the fussy cut flowers under the layers.  the intact long rose ornament was stuck in place as well as the heart frame and swirls before concentrating on making some briar roses and buds using white foamiran  for the petals and lemon l for the flower centres.


To make the flowers I used the smallest of  cherry blossom dies by Rosy Owl ® but any small 5 petal flower die would work just as well.  I coloured the petals using a soft pink oil pastel and then used the distress oxide old paper to add colour to the centres. To make the flower centres you will need to cut a 1cm strip of the lemon foamiran from the short side of the foamiran sheet and then make tiny cuts in the long edge to create a frill. I divided the single strip in to 5 to make five centers. The fringed foamiran was then rolled up and glued at the bottom, squashing slightly to help the fringe spread out. I applied heat to the fringe to give it some texture and used the oxide ink to dull the colour a little so that it co-ordinated with the rest of the project.


The buds were made using the same die – petal 1 was folded together and glued – petal 4 was then brought around petal 1 and glued in place. Petal 2 was then lifted and glued in place followed by petal 5 and then 1. The edges of the bud were coloured with a soft pink oil pastel.


To add another layer of texture I used some of the pink bush stamens and matt heart stamens . The pink bush stamen was divided into approximately 3 pieces and added a few of the matt heart with hot glue.


With all the pieces made I added them to the project to create a look that I found visually pleasing. As flowers do not exist in nature without greenery I broke apart some of the fern fronds and tucked these under the flowers before adding some word stickers so that the piece had real meaning for me.


To add some more interest to the background I stencilled some dots using the old paper distress ink and Snipart bubbles stencil 


I had intended hanging my heart up but as I had covered one of the holes with the paper clay mould added I adhered the heart to the wood paper from the paper pack Hugs and Roses by Lemoncraft® and then placed the piece in a wooden box frame. To tie the frame to the heart I used the damask rose stencil used earlier and the old gold paste to add details to the corners of the frame and then softened the affect of the paste by brushing gently over it with my fingers so that it looked weathered.